Kamal Rails on Hetzner Series Part 1: Deploy Rails application on Hetzner
Kamal is a modern deployment tool for Rails applications, announced by DHH in February 2023 and featured in his RailsWorld Keynote. With Heroku having removed their free tier, Kamal has gained significant traction, particularly for those interested in “leaving the cloud”. Most importantly, Kamal is free and open source, developed by the team at Basecamp who created Rails.
Using Kamal requires you to provision your own server. Popular options include Digital Ocean, AWS, and Hetzner. We’ll use Hetzner, which offers excellent value—you can run a complete Rails application for as little as €4 per month.
This is Part 1 of the Kamal Rails series. I’ll walk you through deploying a vanilla Rails application on Hetzner Cloud.
Prerequisites
- Docker is installed on your local machine (ensure the version is compatible with your OS)
- A Docker account created on Docker Hub
- A Rails application using Rails 6.0 or later
If you don’t have a Rails application yet, create one using:
1
rails new kamal_demo -T -m https://raw.githubusercontent.com/joshio1/rails_application_template/main/application_template.rb
- A Hetzner Cloud account ready to create projects and servers (account verification typically takes about a day)
Steps:
1. Create a VPS on Hetzner Cloud
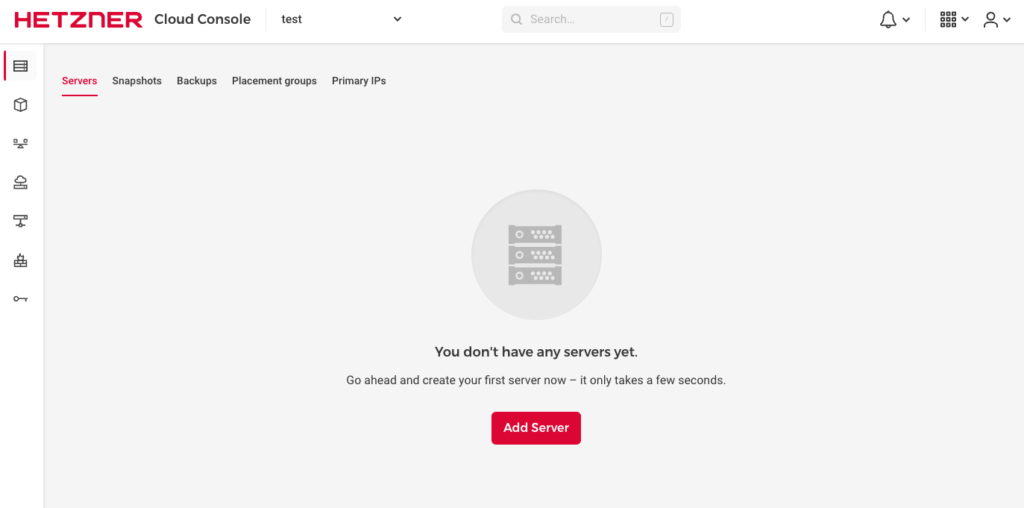
- Log in to Hetzner Cloud and create a new project
- After creating the project, add a server by clicking “Add Server”
- Select your server location and operating system (we’ll use Ubuntu)
- Choose
Shared vCPU (x86) and CPX11(the first plan)
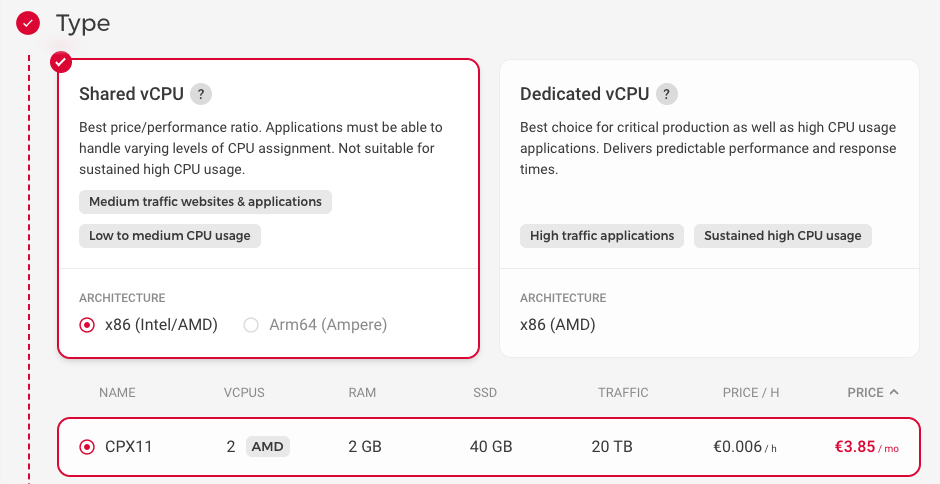
- Select both IPv6 and IPv4
- Add an SSH key to your server. Copy your public key to the clipboard:
1
pbcopy < ~/.ssh/id_rsa.pub
- Paste the key in the SSH section on Hetzner Cloud and click “Create and Buy Now”
- The server will be created in 1-2 minutes. You’ll receive an email from Hetzner. Verify the server is active and has an IPv4 address, then test SSH access:
1
ssh root@<ipv4_address_of_the_server>
2. Prepare Your Rails Application for Deployment
- Navigate to your Rails application’s root directory and verify you have a
Dockerfile - Rails 7.1 and later include a Dockerfile by default
- For earlier versions, use the dockerfile-rails gem to generate the necessary files
A Dockerfile is required because Kamal uses Docker images for deployment.
- Ensure you have a health check route. Rails 7.1+ includes an
/uproute by default that indicates application health - If you don’t have this route, add it to your
config/routes.rbfile:
get '/up', to: ->(env) { [204, {}, ['']] }
- With a Dockerfile and health check route in place, you’re ready to use Kamal.
3. Deploy with Kamal
- Install Kamal:
1
gem install kamal
This installs Kamal 2, the latest version (version depends on your Ruby version).
- Navigate to your Rails application and initialize Kamal:
1
2
cd kamal_demo
kamal init
This creates several files including config/deploy.yml, .kamal/hooks, and .kamal/secrets.
- Configure environment variables:
- Create a Docker Registry access token by logging into your Docker account and navigating to
Account Settings > Security > New Access Token - Obtain your
RAILS_MASTER_KEY, which decrypts your production credentials file (config/credentials/production.yml.enc)- If you don’t have a production credentials file, create one with:
EDITOR=vim rails credentials:edit --environment production
- If you don’t have a production credentials file, create one with:
- There are three ways to manage these secrets in
.kamal/secrets:- Create a
.envfile and load it withdirenv - Use
rails credentials:fetch kamal.registry_password(requires latest Rails) - Use a third-party tool like 1Password with
kamal secrets
- Create a
- For simplicity, we’ll use the first approach with a
.envfile - Use direnv to load environment variables from
.envinto your shell Your
.envfile should look like:1 2
KAMAL_REGISTRY_PASSWORD=<our_docker_access_token> RAILS_MASTER_KEY=<our_rails_production_master_key>
- Create a Docker Registry access token by logging into your Docker account and navigating to
- The
kamal initcommand also creates aconfig/deploy.ymlfile. This file contains the configuration needed to deploy your Rails application. Edit it to match the following:
1
2
3
4
5
6
7
8
9
10
11
12
13
14
15
16
service: kamal_demo
image: joshio1/kamal_demo
servers:
  - <ipv4_address_of_Hetzner_server>
registry:
  username: joshio1
  password:
    - KAMAL_REGISTRY_PASSWORD
builder:
  arch: amd64
  secrets:
    - RAILS_MASTER_KEY
    - SECRET_KEY_BASE
env:
  secret:
    - RAILS_MASTER_KEY
- Key details about the
config/deploy.ymlfile:joshio1is your Docker username andkamal_demois your Rails application name- Kamal automatically references
KAMAL_REGISTRY_PASSWORDandRAILS_MASTER_KEYfrom your.envfile - Replace
<ipv4_address_of_hetzner_server>with your actual server IP
- Set
force_ssl = falseinconfig/production.rbsince we haven’t configured SSL certificates yet. We’ll enable HTTPS in a later part of this series.
After completing the configuration above, deploy your Rails application to the Hetzner server:
1
kamal setup
You should see output similar to:
1
2
3
4
5
6
7
8
9
10
11
12
13
14
15
16
17
18
19
20
21
22
23
-> kamal_demo git:(main) ✗ kamal setup
  INFO [ffc073f1] Running /usr/bin/env mkdir -p .kamal on 5.161.42.10
  INFO [ffc073f1] Finished in 3.630 seconds with exit status 0 (successful).
  Acquiring the deploy lock...
  ...
  Ensure Docker is installed...
  ...
  Push env files...
  ...
  Log into image registry...
  ...
  Build and push app image...
  ...
  ...
  ...
    INFO [57d640dd] Finished in 0.527 seconds with exit status 0 (successful).
    INFO Container is healthy!
  ...
  ...
    INFO [36025396] Finished in 1.358 seconds with exit status 0 (successful).
    Finished all in 288.2 seconds
    Releasing the deploy lock...
    Finished all in 301.2 seconds
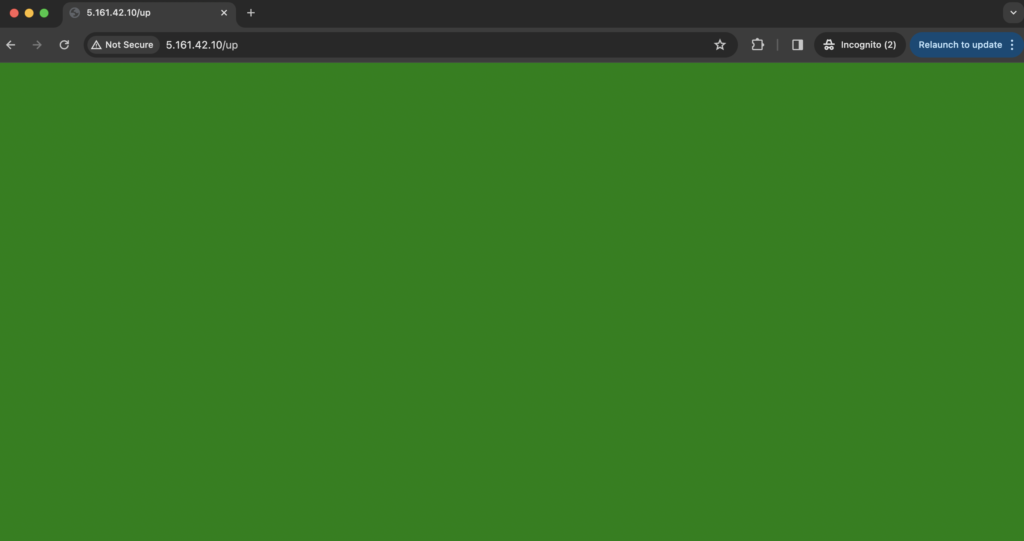
- Once the container is healthy and all steps complete successfully, verify the deployment by visiting
<SERVER_IP>/upin your browser. You should see a green health check screen.
- If you encounter errors during
kamal setupor don’t see the green screen, refer to the Important Points section below.
Next Part: Add Postgres to Your Rails Application
So far, we’ve deployed a basic Rails application with SQLite. In Part 2 of this Hetzner series, we’ll deploy a Rails application backed by Postgres.
Continue to Part 2: Add Postgres
NOTE:
- If this article is out of date, please don’t hesitate to contact me on Twitter from this page and I’ll be happy to update it.
- Listen to this podcast where DHH talks about Rails and Kamal.
- If you would like to search for specific terms or concepts or names in Ruby/Rails podcasts, check out rubypodcatcher.com